Pi-Star DMR
29/01/22 15:35
These step-by-step instructions assume that you all ready have a radio programmed for the hotspot frequency and the talkgroup 51547 in a channel. This will only detail configuration of a simple hotspot and will not go into how to create a hotspot or image a MicroSD.
Requirements:
DMR ID (acquired at radioid.net and good to have on digital modes)
Imaged Pi-Star MicroSD (get image at pistar.uk and belenaEtcher to image with)
RaspberryPi Hotspot (BYO or buy ready made TGIFSPOT.com)
Optional:
TGIF.network account (get at TGIF.network)
MicroUSB to Ethernet adapter (Amazon)
This option is to allow you to connect your hotspot directly to your network via Ethernet.
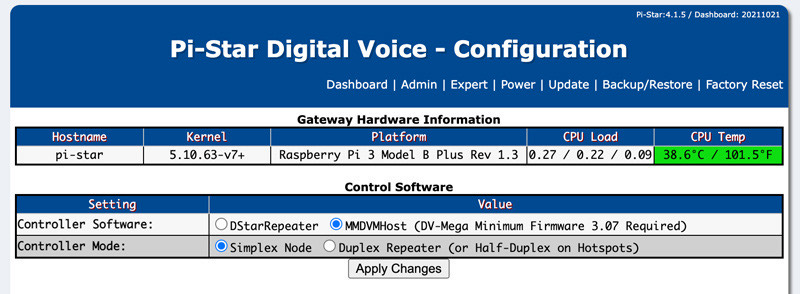
Control Software
- Select MMDVMHost (DV-Mega Minimum Firmware 3.07 Required)
- Select Simplex Node (unless you are running a duplex MMDVM hat)
- Click or tap Apply Changes.

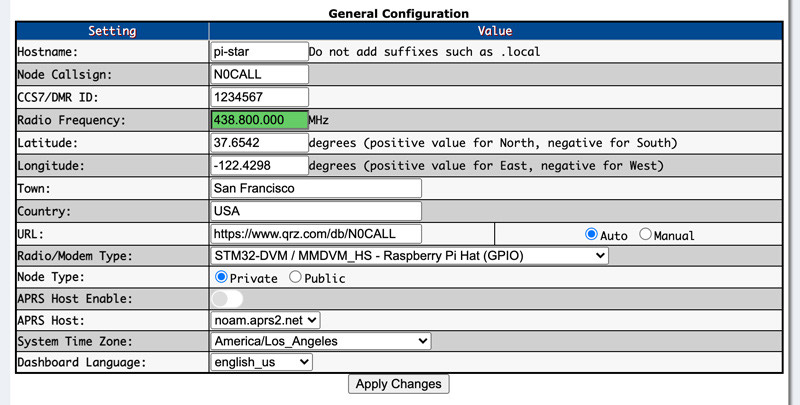
General Configuration
Only change the following
- Leave Hostname as is
- Enter your callsign in the Node Callsign field (just your callsign and no extensions).
- Enter your DMR ID in the DMR ID field (acquired at radioid.net).
- Enter your desired frequency in Radio Frequency.
- Place your QTH latitude in Latitude.
- Place your QTH longitude in Longitude.
- Place your town in Town.
- Place your country in Country.
- Leave URL alone unless you have a website address.
- Select your MMDVM type in Radio/Modem Type.
- Choose Private in Node Type (hotspot will only respond to your a radio with your DMR ID).
- Select your time zone in System Time Zone.
- Select english_us in Dashboard Language.
- Click or tap Apply Changes.
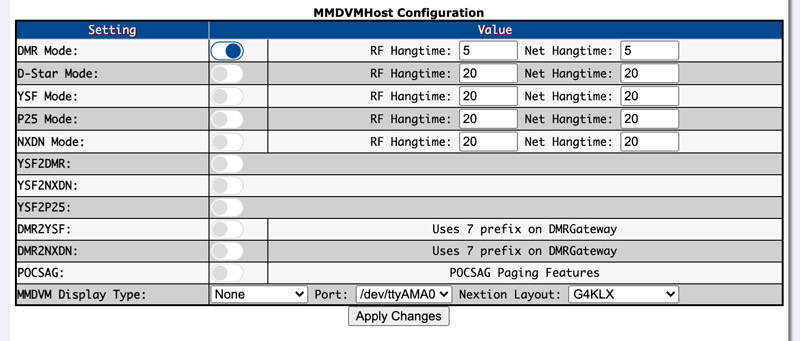
MMDVMHost Configuration
- Select DMR Mode
- Set RF Hangtime and Net Hangtime to 10 or not less than 5
- Click or tap Apply Changes.
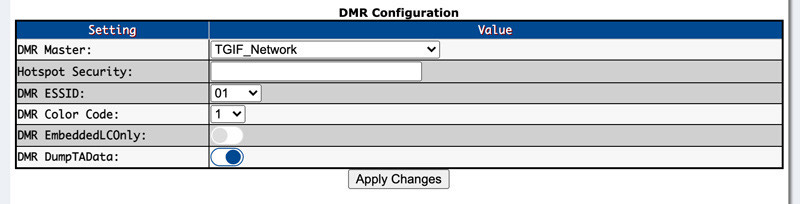
DMR Configuration - TGIF.network
- Select a master in DMR Master in the drop down TGIF_Network
- In Hotspot Security, enter your TGIF.Network account password or keep it blank- it will default to the legacy "passw0rd" on its own.
- Click or tap Apply Changes.
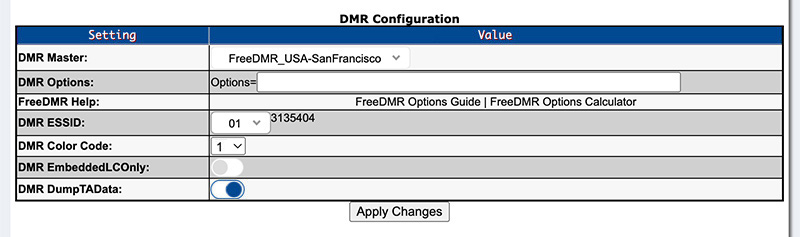
DMR Configuration - FreeDMR
- Select a master in DMR Master in the drop down FreeDMR_USA-SanFrancisco
- If you can not find this master, please update Pi-Star to update the host files.
- Keep Hotspot Security blank - it will default to the "passw0rd" on its own.
- Click or tap Apply Changes.
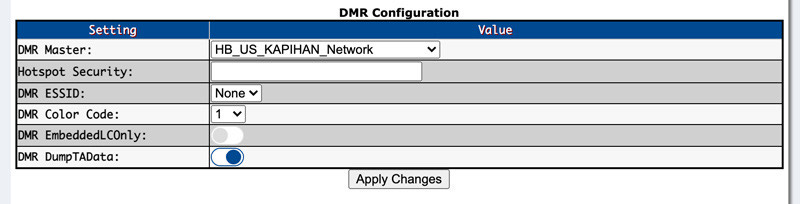
DMR Configuration - KAPIHAN Network HBLink
- Select a master in DMR Master in the drop down HB_US_KAPIHAN_Network
- If you can not find this master, please update Pi-Star to update the host files.
- Keep Hotspot Security blank - it will default to the "passw0rd" on its own.
- Click or tap Apply Changes.
Check Connection to Master
- You can do this by hitting Admin up at the top of the page.
- Mid-way down and to the left, you should see Network Status and DMR Net being green.
- Also at the bottom-left, it should should say what DMR Master you are connected to.
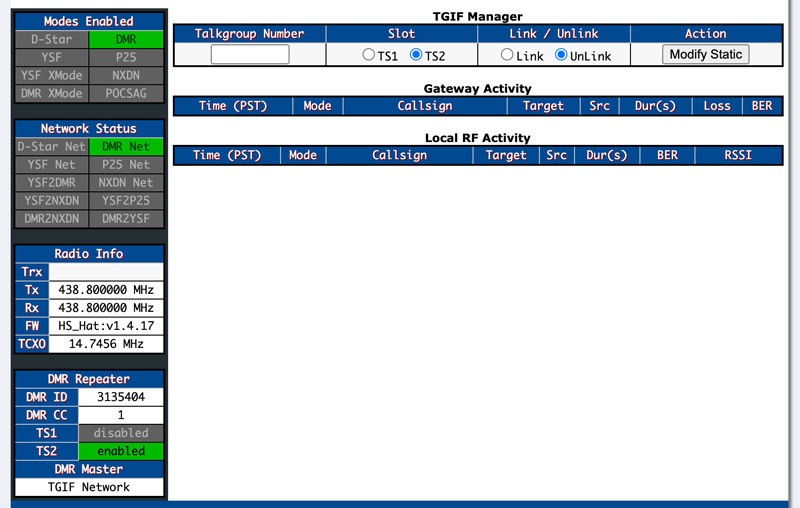


CONGRATULATIONS!
If all went well, you should now be connected to the KAPIHAN Network. Feel free to modulate and hope to talk to you soon! 7-3
Set up your Pi-Star for C4FM >